


Opening my apartment door remotely with Homey
The Do-It-Yourself category of the Homey Blog is a place where employees can share some of their own projects. Some technical background might be required when following the instructions!
I live in a shared apartment building. The front-door of the complex is normally opened by my key, or when someone dials my house number I can open the door remotely when I'm at home.
The key I use to open the door is attached to a keychain, which is in the lock of my bike. So the problem is clear: when I approach home, I have to lock the bike, get the key, open the door, and unlock the bike again. And worse, get off the bike! Argh.
One day however I figured out that the intercom system in my apartment can open the door remotely - even when no one ringed my apartment's number! Obviously this had to be connected to Homey.
Project requirements
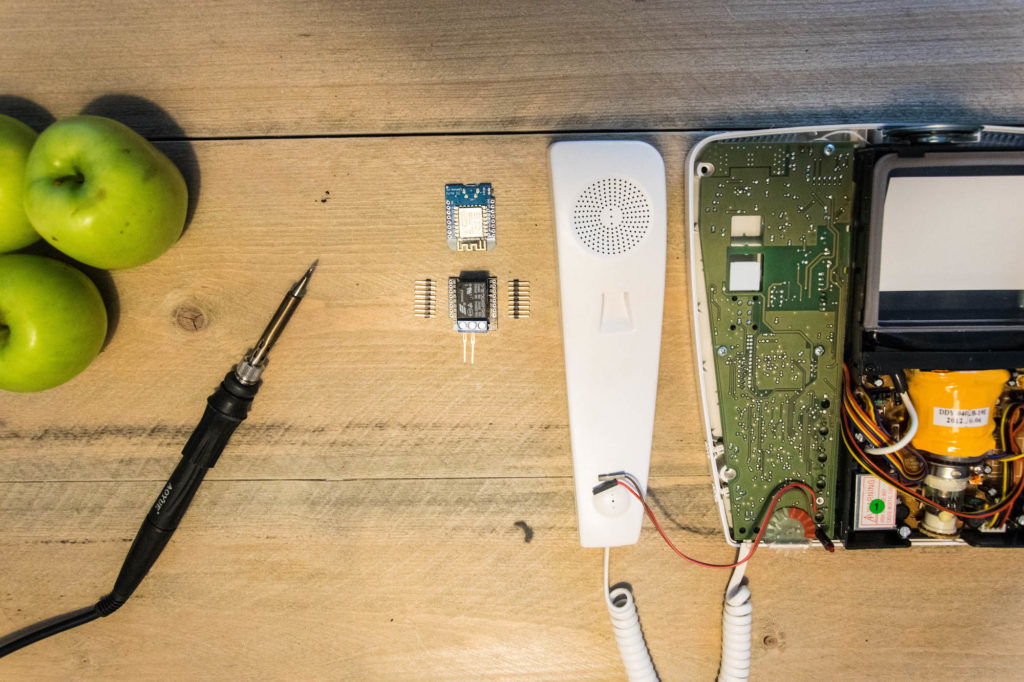
This project will describe how to remotely open the door using the intercom system. If you're planning to do this yourself as well, you will need:
- Homey
- Intercom with a physical button
- Wemos D1 Mini (link)
- Wemos Relay shield (link)
- 5V Micro-usb power supply
- Two jump wires
- Basic soldering skills
My intercom has a push button that -when pressed- connects two contacts, which then opens the door. One way to connect two wires automatically is by using a relay. The relay is switched on and off by the Wemos D1 module, a Wi-Fi enabled prototype board based on the ESP8266 chip. Homey sends a signal to the Wemos D1 - but first let's connect the electronics.
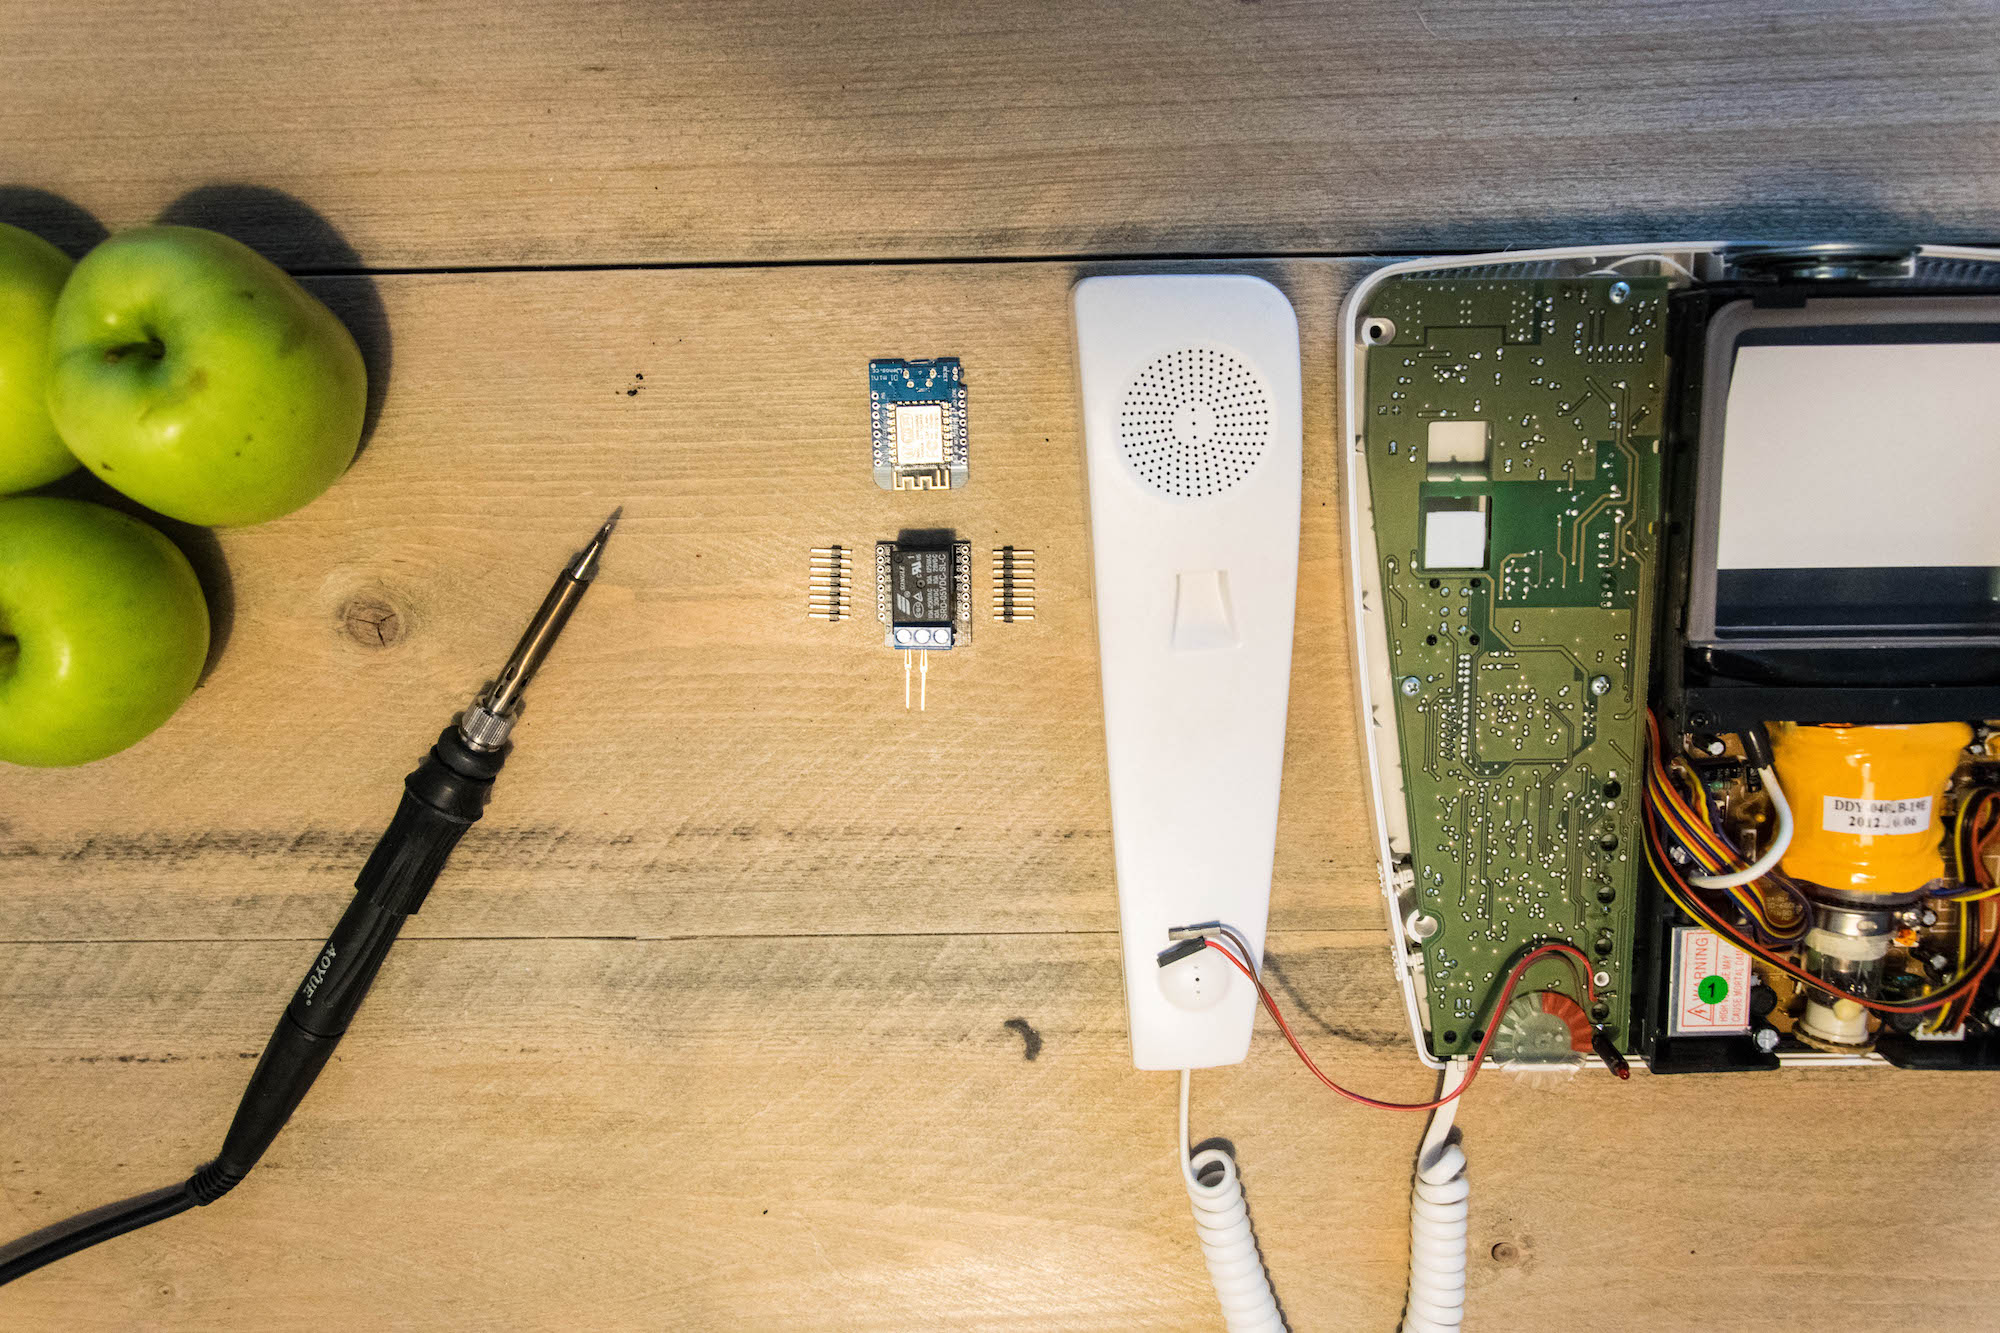
Wiring the electronics
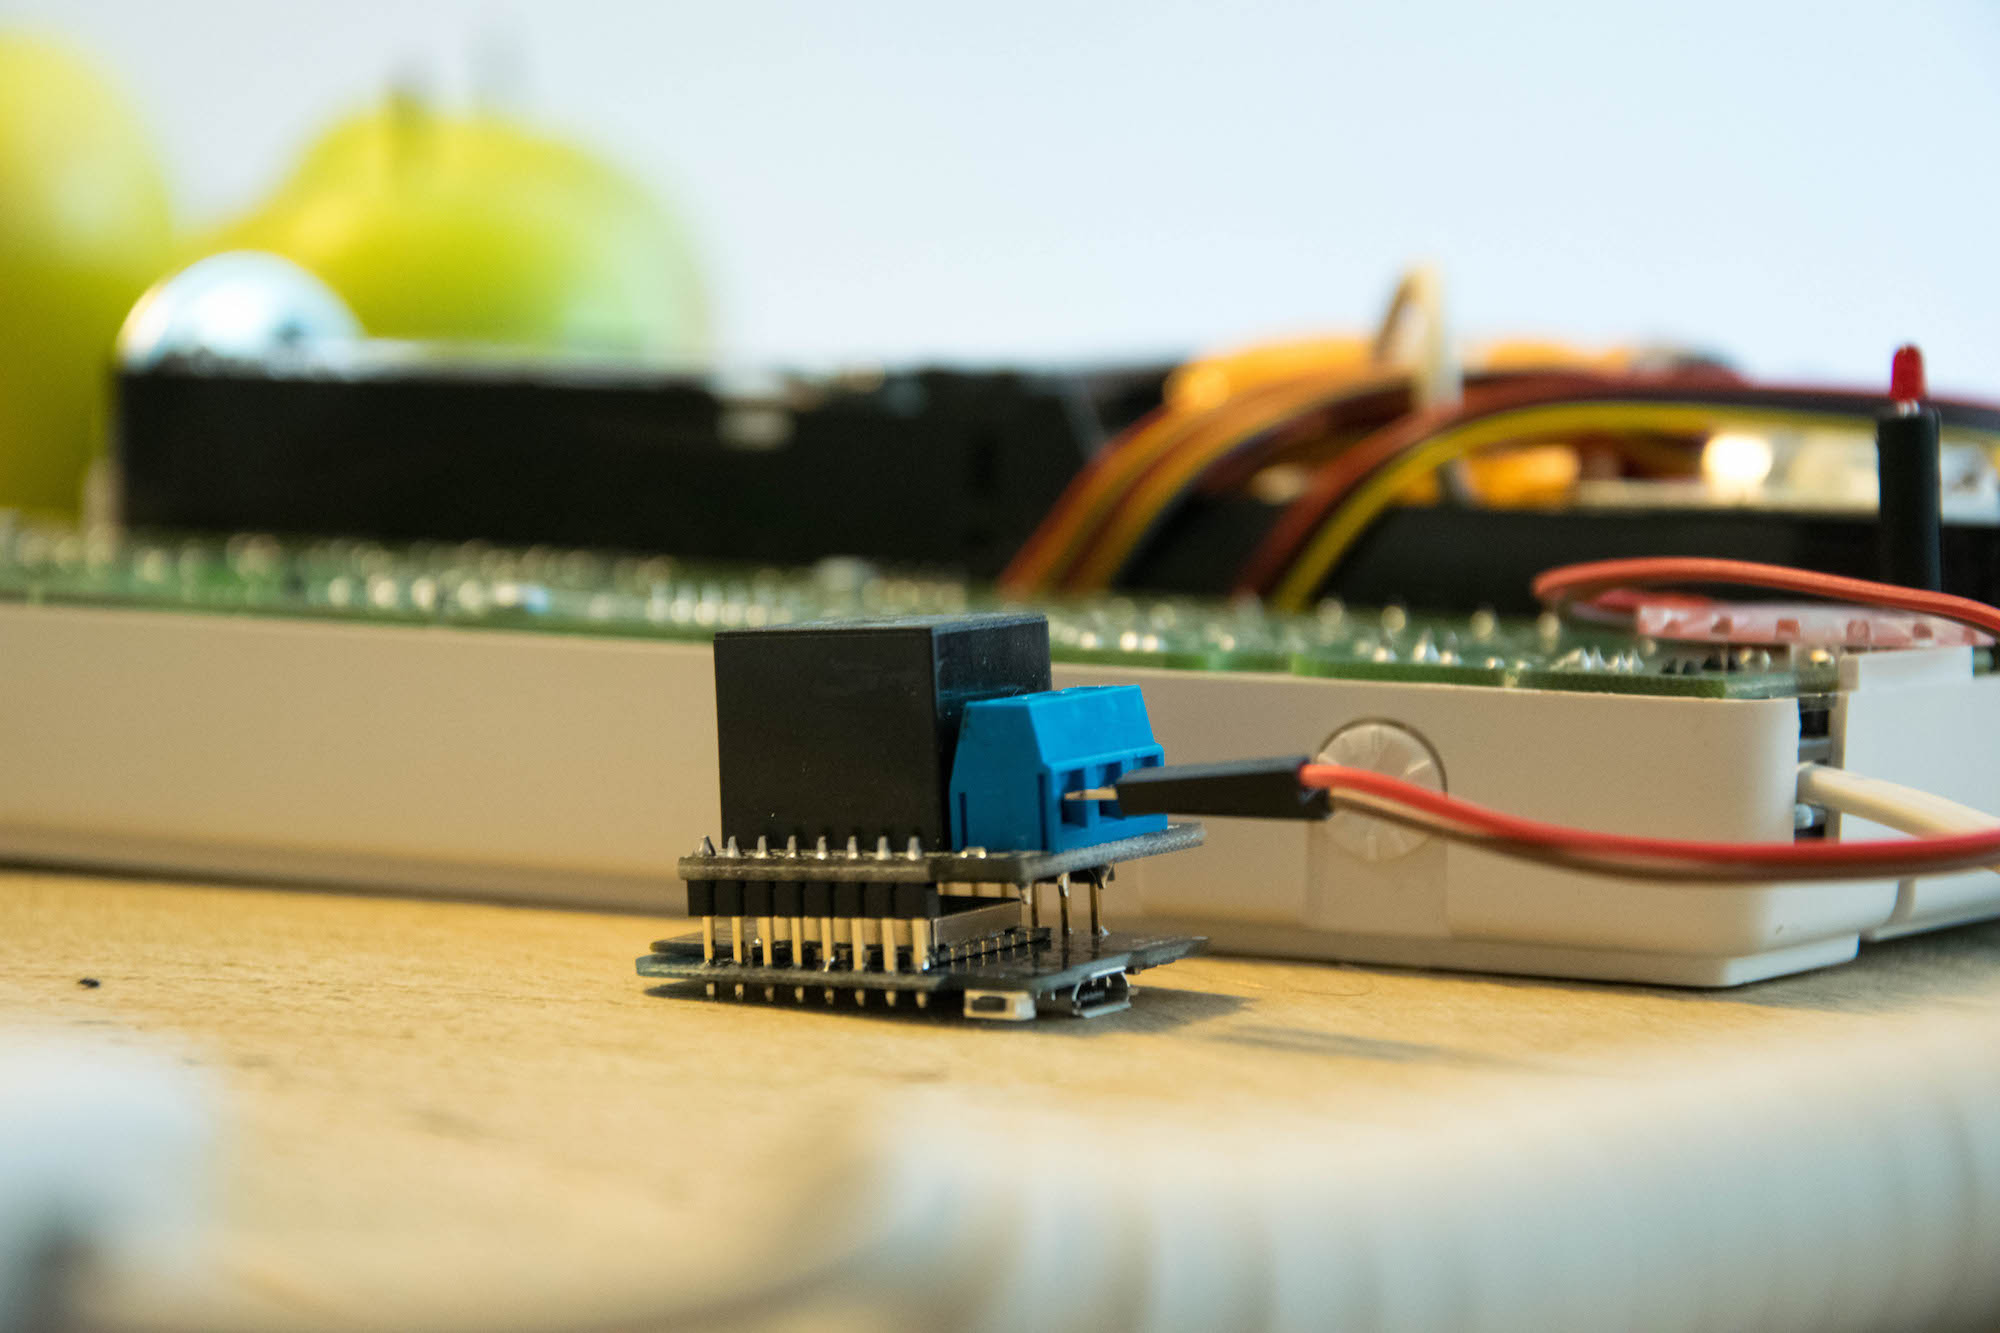
The first step is to solder the Wemos Relay shield to the Wemos D1 Mini.

The final result should look like below:
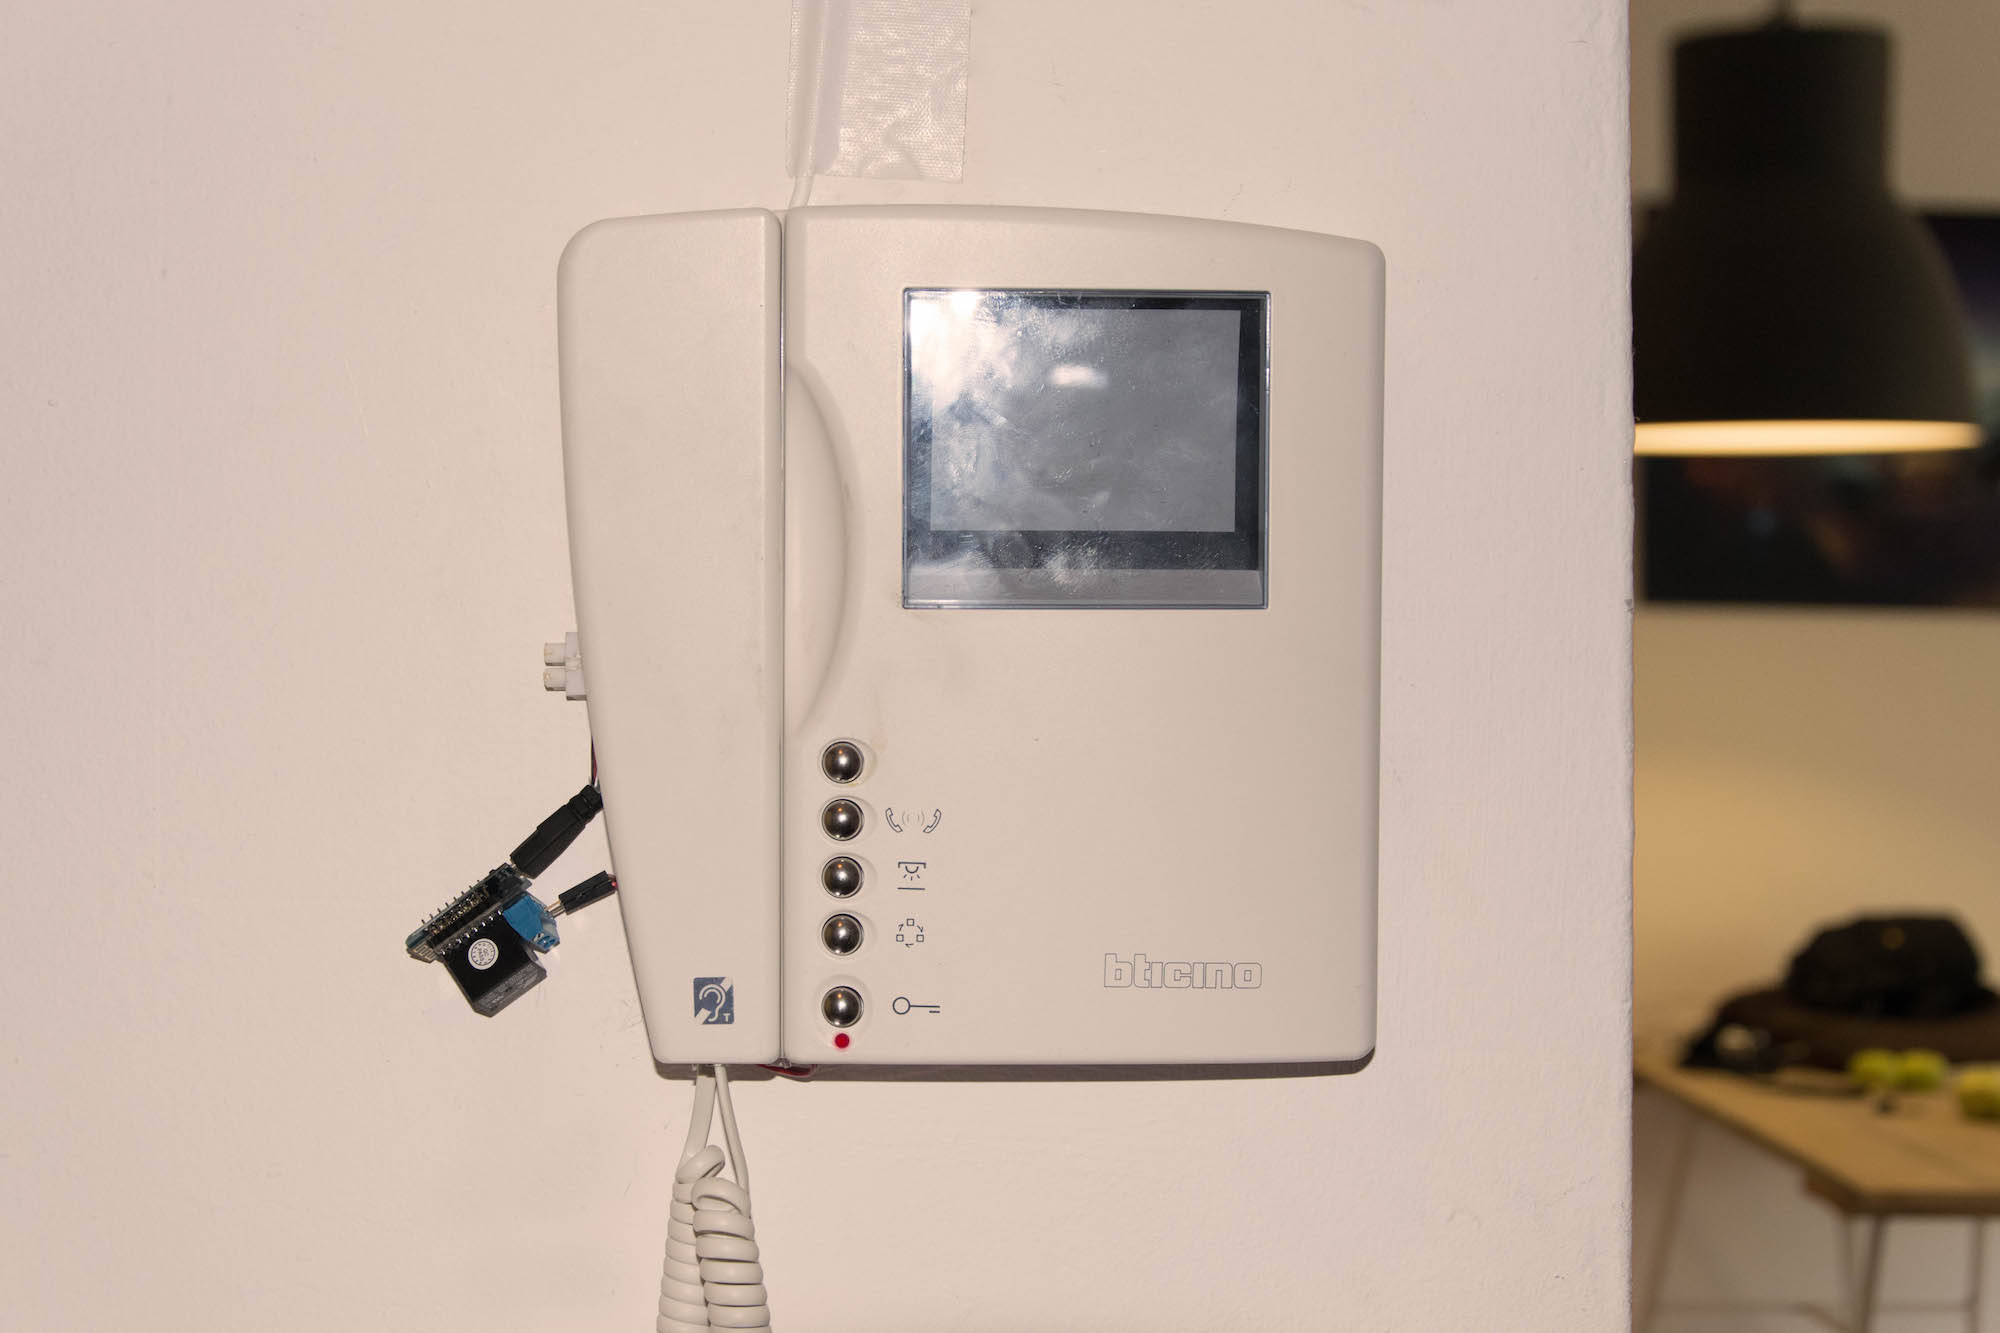
Next, open up your intercom and solder two wires where the button should make contact.
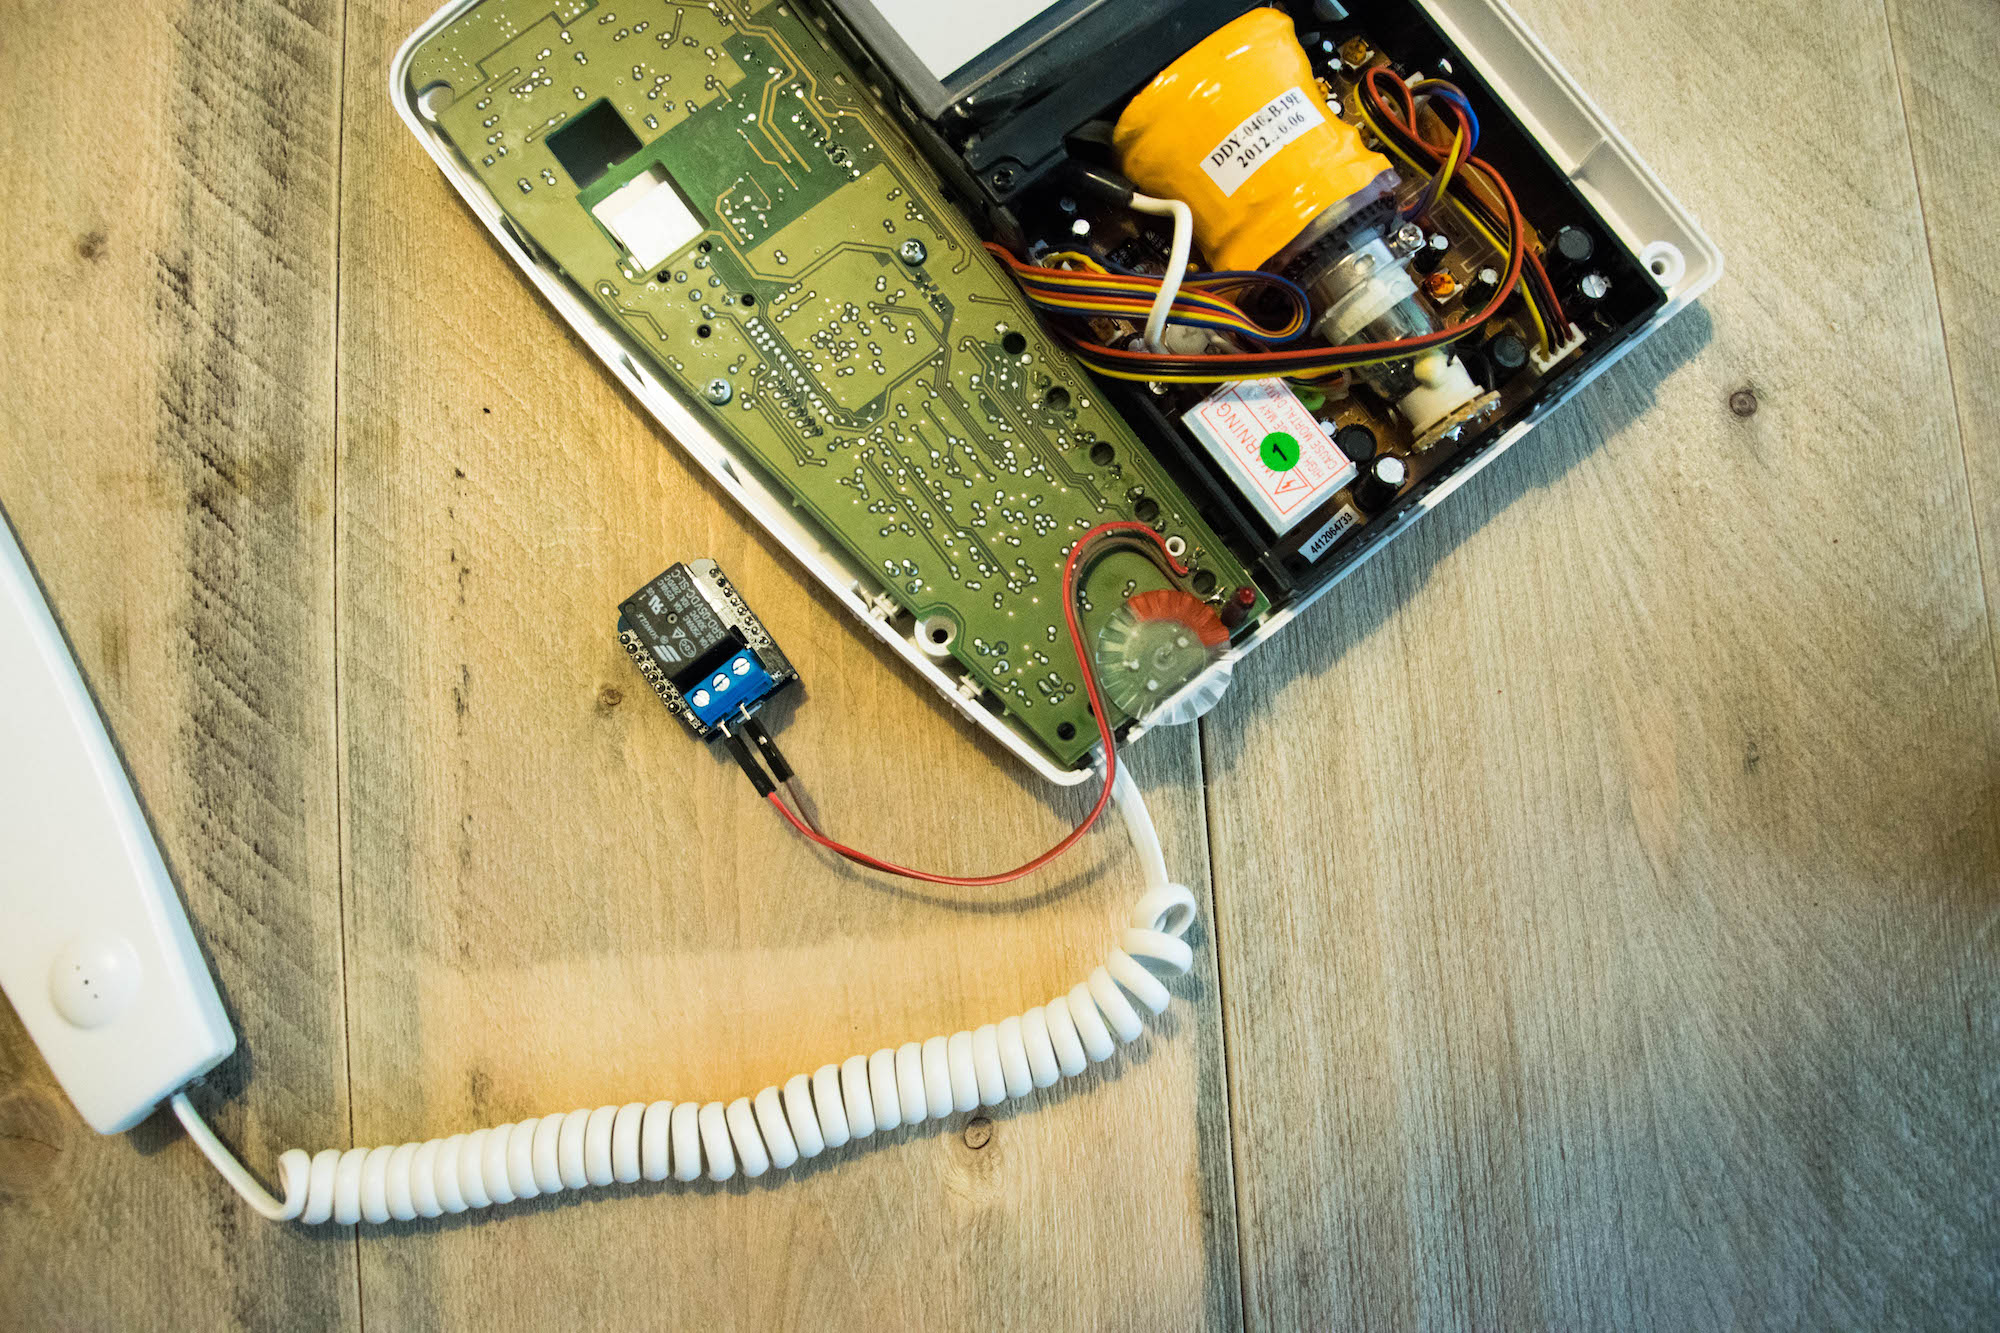
Connect the two wires to the NO (Normally Open) and the C (Common, in the middle) contacts. The button will now not make any connection unless instructed to do so. For more information about how relays work, Instructables has made a great background article about relays.
Flashing the firmware
The Wemos D1 Mini is a microcontroller, and needs some firmware to run. Install the Arduino software as described in this tutorial.
The software I've written (named RelayCtrl)is nothing more than a webserver with a /toggle endpoint, which quickly toggles the relay on, waits 500ms, and turns the relay off again.

Download the source code from my GitHub repository and flash it on the Wemos D1 Mini from a PC. After flashing, connect to the Wi-Fi network named RelayCtrl. Follow the instructions to connect the module to your Wi-Fi network.
When the unit is connected to Wi-Fi, disconnect it from your PC, re-assemble your intercom and connect the 5V Micro-usb adapter to the module.
To test the system, navigate to http://relayctrl.local/toggle in your browser. Upon visit, you should hear the relay briefly click on and off.
Connecting to Homey
The relay now can only be controlled when connected to your Wi-Fi network, that's great! But when you're in front of the door, you're usually not connected to your home's Wi-Fi! Luckily for us Homey is always reachable, even from outside your Wi-Fi network, e.g. over your mobile 3G/4G network.
I've used the following apps on Homey:
All three are made by our amazing community. Thank you for these very helpful apps!
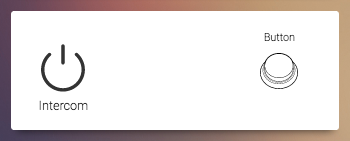
First, create a virtual 'Button' device using the Virtual Devices app, and choose an icon you like.
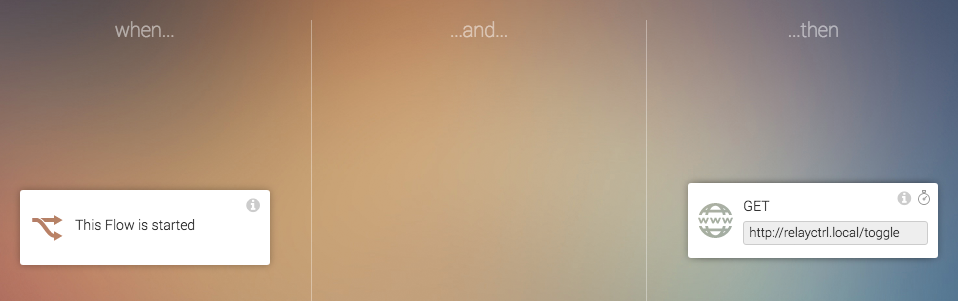
Next, I've created two Flows. The first Flow actually toggles the relay by sending a HTTP GET request, just like we did in the browser.
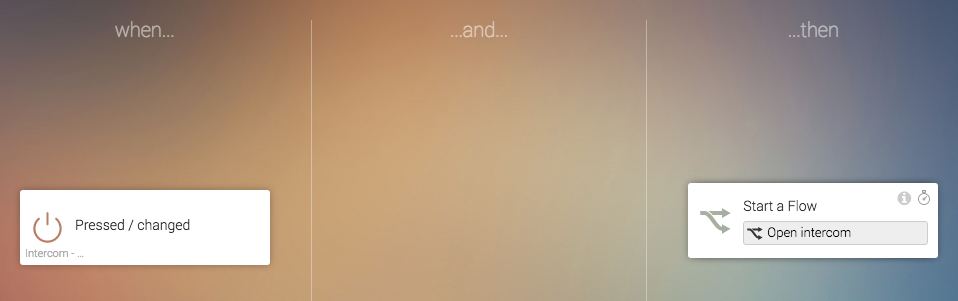
The second Flow starts this Flow when the virtual device's button has been pressed:
Now we can open the door from within the Homey app. Neat!
Adding an Android widget
Opening the Homey app can take a few seconds. While we're working on a new version of the app which is a lot faster, I'm too impatient and created my own solution.
So I've added a third Flow:
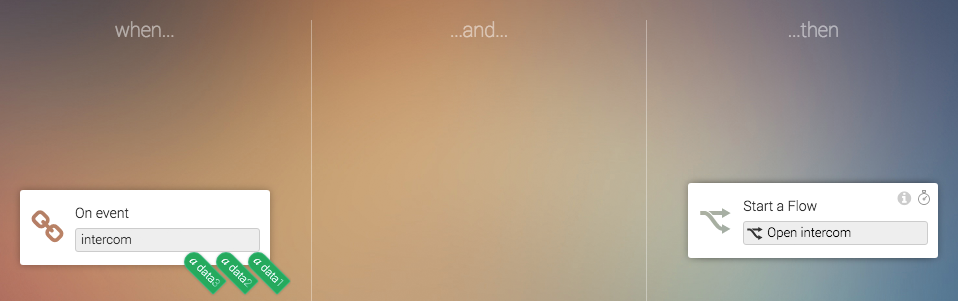
When a Webhook is received (this is an URL accessible from anywhere in the world), the intercom is also opened. Next, I've downloaded the HTTP Widget app from the Google Play Store on my Android phone. Simply add a widget to your homescreen, copy-paste the webhook URL from Settings → Webhook Manager in Homey and replace your_event_name with intercom and paste it in the widget. My URL looked like this: `https://webhooks.athom.com/webhook/57274085acb3bd6d24b3d200/?token=mytokenhere&event=intercom&data1=a&data2=b&data3=c`
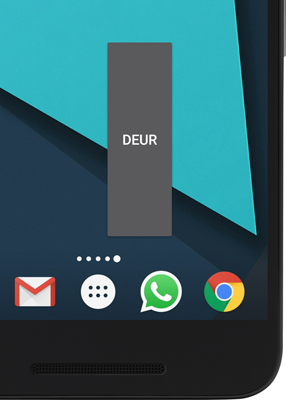
Now you can open the intercom from your phone's homescreen! This is very fast and it feels amazing to cycle inside the apartment building while the door is opening. My neighbours really were wondering how the hell I did that.
Future improvements
I've tried tinkering with a Bluetooth iBeacon to automatically open the door when I'm in the neighborhood - but the reliability isn't as good as I'd hoped it to be yet. But with this setup, opening the door can be done from anywhere: a friend's phone, a 433 MHz remote... you name it!
I hope this blog was fun reading and made you think about the things you can do with Homey!
— Emile
